We are going to build a simple script that, when executed, prints out the IP address of Google’s Search server. This script will use the Geekflare DNS Lookup API. To build it, we are going to use three approaches, the first uses the built-in https module in NodeJS. The second will use the node-fetch module. Then the last will use the axios client library.
What is the Geekflare API?
Geekflare API offers suits of REST APIs for website performance, DNS, and security metrics testing. You can do stuff like take a screenshot, generate PDFs, do web scraping, port scanning, and a lot more.
Prerequisites
To follow this tutorial, you will need an understanding of JavaScript, including promises and ES6 syntax. As for the software, you should have NodeJS and a text editor such as Visual Studio Code installed. You will need a Geekflare account to get an API key for authentication when making requests. To get one, head to the API landing page and create a free account. After you create the account, you should be redirected to the dashboard, where you will find your API key.
Building the project
To begin, create a project folder and open it with a terminal of your choice, then run the command below.
The above command will initialize the project directory as a NodeJS project.
Next, run the command below, which will install all dependencies for our project
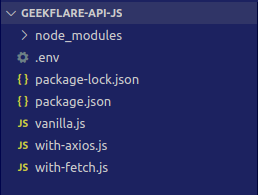
After the dependencies have been successfully installed, create three scripts in the project root folder namely vanilla.js, with-axios.js, with-fetch.js and a .env file to store our environmental variables.
In the end, the project root should look like this:
Next, open the .env file and add your Geekflare API key with the following line of code:
Replace
Vanilla.js
NodeJS has a built-in http and https module that we can use to make client requests. We are going to use this approach first. Open the vanilla.js file and add the following lines of code at the top to import the project’s dependencies. Next, we are going to call the config() function to load environmental variables. Then we are going to store the API key and hostname in variables. When we call the request function to start an HTTP request in NodeJS, we will need to provide options for the host and endpoint we want to connect to, the HTTP method we are going to be using, and the headers for the request. So next, we are going to create a variable that will store these options. So far, the code in the vanilla.js file looks like this: Now we can proceed to call the request function passing in the options method: As you can see, the request function takes in two arguments. The first is the options object we defined earlier. The second is a callback function that will handle the response from the server. Inside the callback function, we can add event listeners for when the server sends data, finishes sending data, or sends an error. To add the different response handlers, add the following lines of code inside the callback function: The data variable is simply a string where we are going to store the server’s JSON response as it is streamed back to us. To actually store the data, we are going to listen to the response object’s on data event. Whenever this event is fired, we are going to append the chunk of data sent by the server to the data variable. Then to finally use the data, we are going to listen to the on end event on the response object. This will be called when all the data has been sent from the server, and it has ended its response. Lastly, we are going to listen for errors and log them to the console if they arise. Therefore the call to the request function should look like this Lastly, we need to write some data to the request body and end the request. In the end, the file should look like this: Now, if you go back to the terminal and run the script using the node vanilla.js command, you should get the following output. That’s it for the first part. The obvious disadvantage of using the built-in HTTP/S modules is that it is verbose. Client libraries such as node-fetch will help you create the same program but with clearer and more concise code.
node-fetch
To create the same script but with node-fetch, open the with-fetch.js file and add the following imports to the top. Then call the config function to configure environmental variables and set up constants for the API_KEY and the host whose A records we are going to be requesting. Next, we are going to define a function to make the API call. This function will be asynchronous. Inside the function’s body, we need to call the fetch function we imported earlier from the node-fetch package. Then after the call to the fetch function, we would want to parse our response and handle any errors that may arise. At this point, add a call to the function after its request. Your file should now look like this: And running that script with node with-fetch.js should produce the following output:
Axios
Lastly, we are going to use Axios to access the Geekflare API. To begin, let’s import the dotenv and axios packages. Next, let’s call the config function to set up environmental variables. Additionally, let’s store the host’s name and the API Key in separate constants. Now, let’s store the URL of the API endpoint in another constant Next, let’s store the data which will be sent as part of the request body in another constant Then the last thing to do before sending out the request will be to also store the meta options, such as headers, in another constant. Lastly, let’s make the call to the post function we imported earlier, passing in the url, data and options variables we defined earlier as arguments. Because this will return a promise, you can then use then to handle the response when it is eventually returned. At the end of all this, the code in the with-axios file should look like this: And when you run the script using node with-axios.js, it should display the following output:
Final Words
In this post, we created the script with three different approaches. The objective of this was to highlight how easy using the Geekflare API is, and how we might go about using it in Javascript, specifically NodeJS. Explore Geekflare API documentation for more.
![]()
![]()


![]()
![]()
![]()
![]()

![]()


![]()
![]()
![]()

